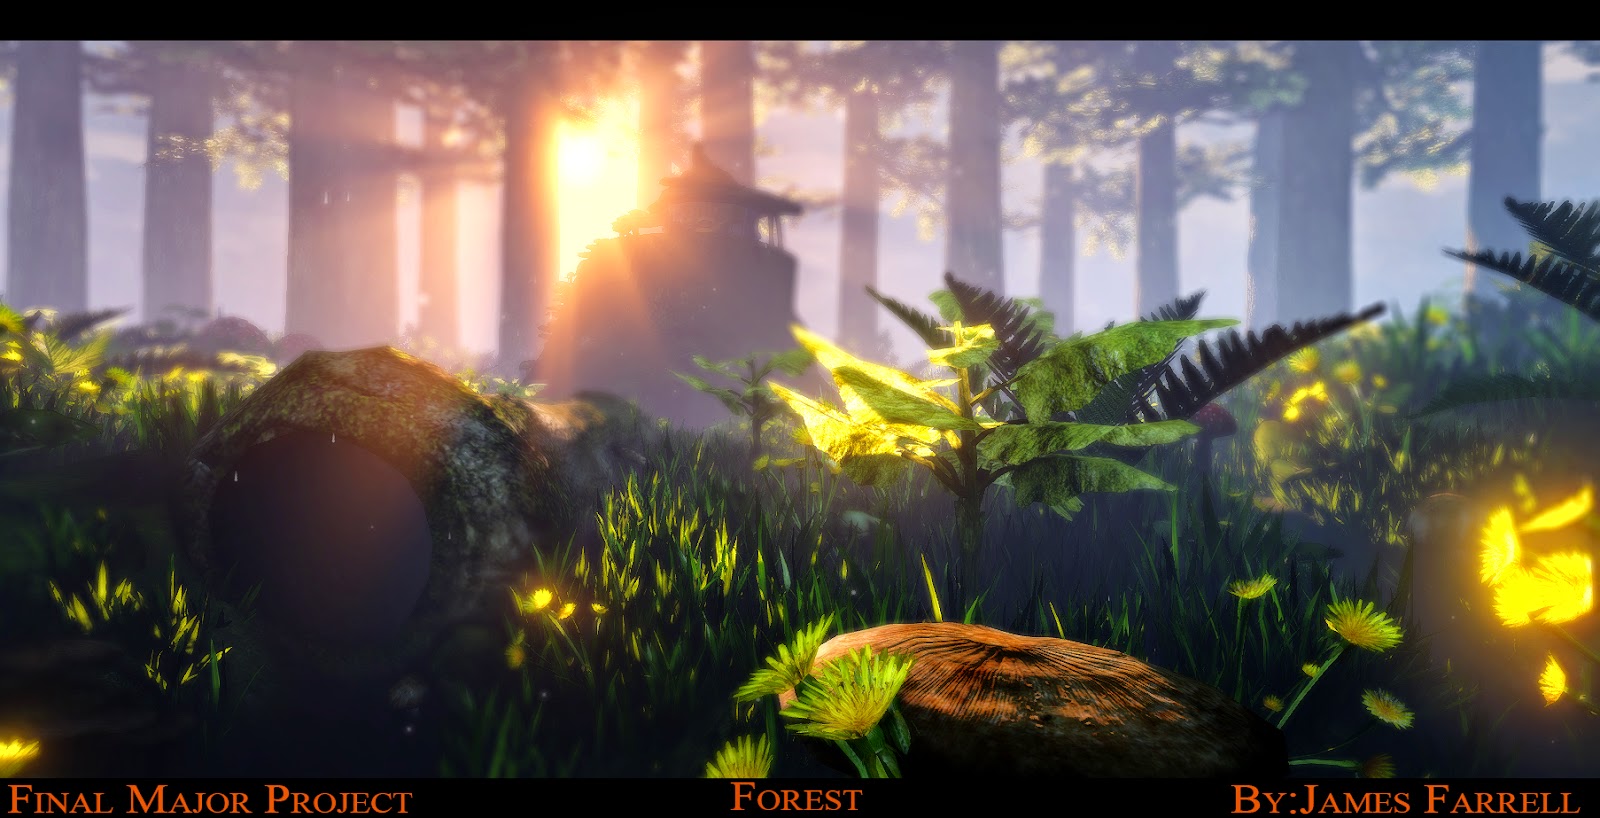
Well here it is, my Fly-Through and my Conclusion of my Final Major Project!
I manage to get sort out that problem I had with my building, going blurry and having that lod effect. However after I did all my final renders and video capture. I retook the video again but still it doesn't seem to work when recording, although at least I have them working in the editor.
 |
| Back of the house |
 |
| Left side of the house |

 |
| Front of the house |
 |
| Right side of the house |
Conclusion
I'm very pleased. with how the building turned out and my level. With all my personal interests and understanding, symbols & meanings and the overall design of my Natural Homes Fantasy Wizard Building, I'm happy that I finally achieve something in it's caliber and the theme of what Natural Homes are all about. I've improved so much from my second year, summer project which I made a Natural Homes/ Building hand-painted camp scene and knowing hardly anything of what I know now to manifest and bring to life my Final Major Project.
It was a massive struggle for myself, to learn, understand and obtain the skills that was needed to create this. I've learnt and picked up Z Brush and UDK, improved my sculpturing, modeling skills and efficiency in 3D max and understanding the pipeline process in baking and texturing and overall improve my drawing, painting and concepting. I had massive obstacles and challenges in all multidimensional aspects, that I went through, which was 'a living hell' but it was all necessary for myself to over come them, learn, grow and breakthrough the darkness and into the light!
I've learn't a hell of a lot of the UDK engine. Such knowledge like adding water with effects like ripples and blurriness when your in it, skybox, editing, special effects such as rain, pollen, sound and lightning and many other tweaks and improvements through the properties. I've understood alot about the Kismet and the Timeline feature, specially when doing effects such as lightning(flashes) & thunder(sound). I have also gained a deeper understanding when creating my fly-through, setting up my cameras which I had about seven of them and then tweaking the options for extra special affect when recording my level and then connecting everything together making sure they are all recorded properly.
With myself struggling of commitment, focus and time management at times which I have definitely learn't from at the end of it all. I realize that I haven't fully 100% completed my 'grand-vision' of my level and proposal. However I have made great leaps in progression to acquire the right body of knowledge and skills to keep on achieving to eventually manifest everything in my minds-eye!
With myself struggling of commitment, focus and time management at times which I have definitely learn't from at the end of it all. I realize that I haven't fully 100% completed my 'grand-vision' of my level and proposal. However I have made great leaps in progression to acquire the right body of knowledge and skills to keep on achieving to eventually manifest everything in my minds-eye!
But for that, I shall leave this as it is, move on and take forward all my lessons!
Thanks you :)

I had a few more GIFS but it was slowing down the page, hopefully one is fine :)